How to create Kubernetes Jobs from AWS Lambda
In modern cloud-native architectures, automation and scalability are critical for efficiently handling workloads. Kubernetes Jobs are a great tool for running one-time, short-lived tasks in your Kubernetes cluster, while AWS Lambda provides a serverless approach to running code in response to events without needing to manage any infrastructure. By combining the power of AWS Lambda with Kubernetes Jobs, you can trigger and run tasks in your Kubernetes cluster dynamically based on external events, such as file uploads, API requests, or messages from other AWS services.
This integration is especially useful in scenarios where event-driven processing is needed, such as performing batch operations, running data pipelines, or scaling up resources temporarily to handle specific workloads. In this guide, we’ll walk through how to create Kubernetes Jobs directly from AWS Lambda, providing a practical solution for managing and automating tasks across your cloud and container infrastructure.
Prerequisites
Before you begin, make sure you have the following prerequisites in place:
- An AWS account with permissions to create and manage Lambda functions.
- A Kubernetes cluster. You can create a free Kubernetes cluster using Cloudfleet and follow the Getting Started guide.
- Create a new Cloudfleet service account and save the client ID and secret. If you are using other Kubernetes services, you will need to adjust the code to accept a static kubeconfig file.
- Optionally, install the
cloudfleetandkubectlcommand-line tools on your local machine to debug the code.
Create a New AWS Lambda Function
AWS Lambda provides a variety of runtimes that you can use to run your code, including Node.js, Python, Ruby, Java, Go, .NET, and custom runtimes. In this guide, we’ll use a custom runtime to run a Bash script that interacts with the Kubernetes cluster using the kubectl command-line tool.
To create a new AWS Lambda function, follow these steps:
-
Open the AWS Lambda console and click the “Create function” button.
-
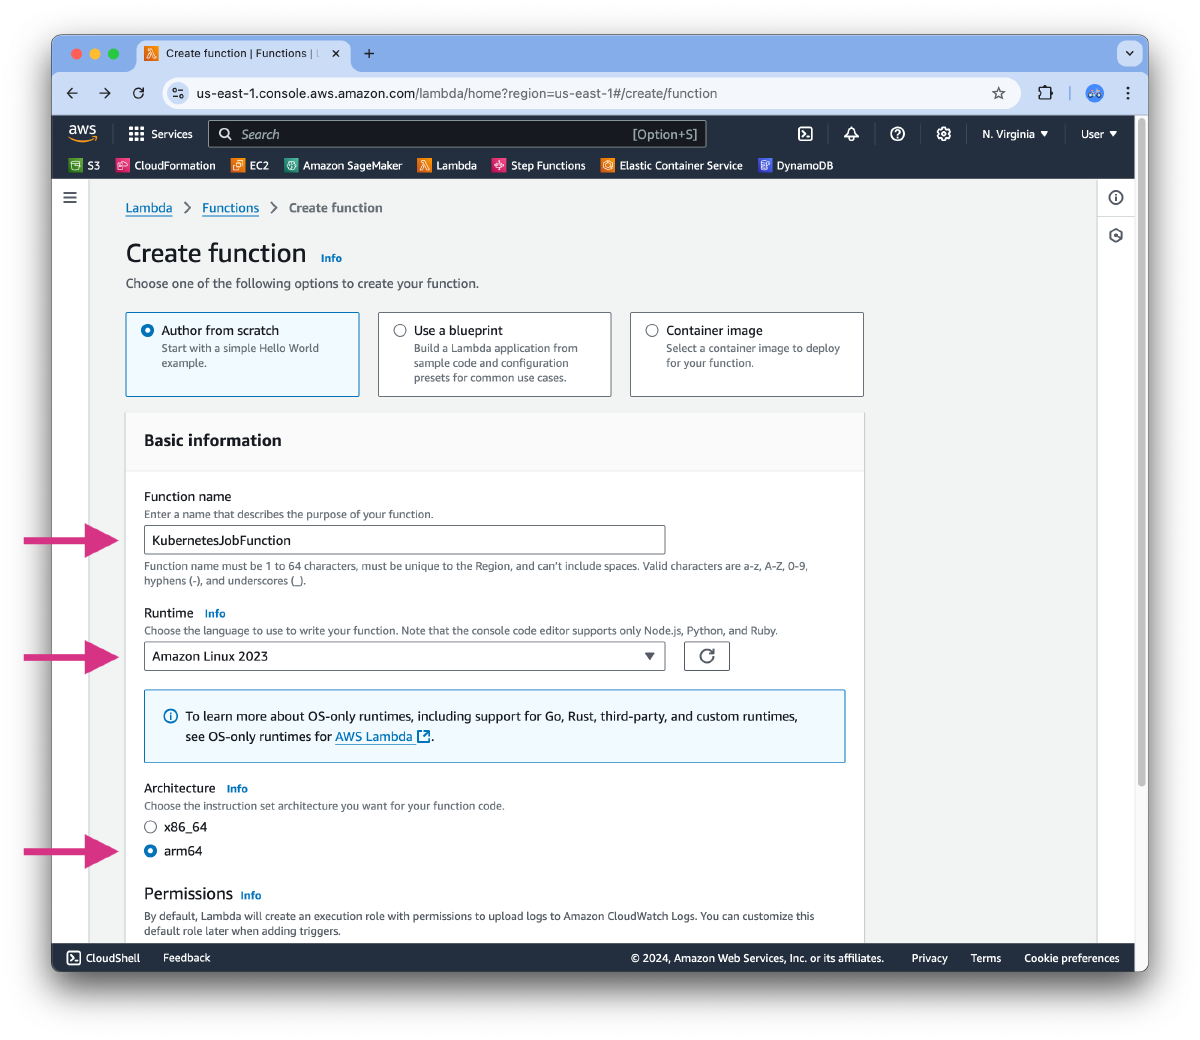
Choose “Author from scratch” and provide a name for your function, such as
KubernetesJobFunction. In the Runtime dropdown, select “Amazon Linux 2023”. For this example, we will use ARM architecture. In the Architecture section, select “arm64”. You can leave the rest of the settings as default. Click the “Create function” button.
- In the function configuration, scroll down to the “Function code” section. AWS creates sample
bootstrap.sh.sampleandhello.sh.samplefiles for custom runtimes. We will base our implementation on these files. Renamebootstrap.sh.sampletobootstrapand replace the content with the following code:
#!/bin/sh

set -euo pipefail
export NONINTERACTIVE=1
export HOME=/tmp

# Prepare a new directory for binaries
mkdir -p /tmp/bin
cd /tmp/bin
export PATH=$PATH:/tmp/bin

# Install the latest version of kubectl
curl -s -LO "https://dl.k8s.io/release/$(curl -L -s https://dl.k8s.io/release/stable.txt)/bin/linux/arm64/kubectl"
chmod 0755 /tmp/bin/kubectl

# Install the latest version of cloudfleet CLI
curl -s -o cloudfleet https://downloads.cloudfleet.ai/cli/0.3.11/cloudfleet_linux_arm64
chmod 0755 /tmp/bin/cloudfleet

# Install the latest version of jq
curl -sS -o jq -L0  https://github.com/jqlang/jq/releases/download/jq-1.7/jq-linux-arm64
chmod 0755 /tmp/bin/jq

# Authenticate with Cloudfleet using Service Account
cloudfleet auth add-profile token default $CLOUDFLEET_ORG $CLOUDFLEET_TOKEN_ID $CLOUDFLEET_TOKEN_SECRET

# Update kubeconfig file for the cluster
cloudfleet clusters kubeconfig --kubeconfig /tmp/.kube/config $CLOUDFLEET_CLUSTER_ID

# Initialization - load function handler
source $LAMBDA_TASK_ROOT/"$(echo $_HANDLER | cut -d. -f1).sh"

# Processing
while true
do
  HEADERS="$(mktemp)"
  # Get an event. The HTTP request will block until one is received
  EVENT_DATA=$(curl -sS -LD "$HEADERS" "http://${AWS_LAMBDA_RUNTIME_API}/2018-06-01/runtime/invocation/next")

  # Extract request ID by scraping response headers received above
  REQUEST_ID=$(grep -Fi Lambda-Runtime-Aws-Request-Id "$HEADERS" | tr -d '[:space:]' | cut -d: -f2)

  # Run the handler function from the script
  RESPONSE=$($(echo "$_HANDLER" | cut -d. -f2) "$EVENT_DATA")

  # Send the response
  curl -sS -o /dev/null "http://${AWS_LAMBDA_RUNTIME_API}/2018-06-01/runtime/invocation/$REQUEST_ID/response"  -d "$RESPONSE"
done
- Rename
hello.sh.sampletohello.shand replace the content with the following code:
function handler () {
    EVENT_DATA=$1

    # Extract kubectl parameters from the event data
    params=$(echo $EVENT_DATA | jq -r '.[]')

    # Run kubectl command with the provided parameters
    RESPONSE=$(kubectl --kubeconfig /tmp/.kube/config -o json $params )
    echo $RESPONSE
}
-
Deploy the function by clicking the “Deploy” button in the top right corner of the console.
-
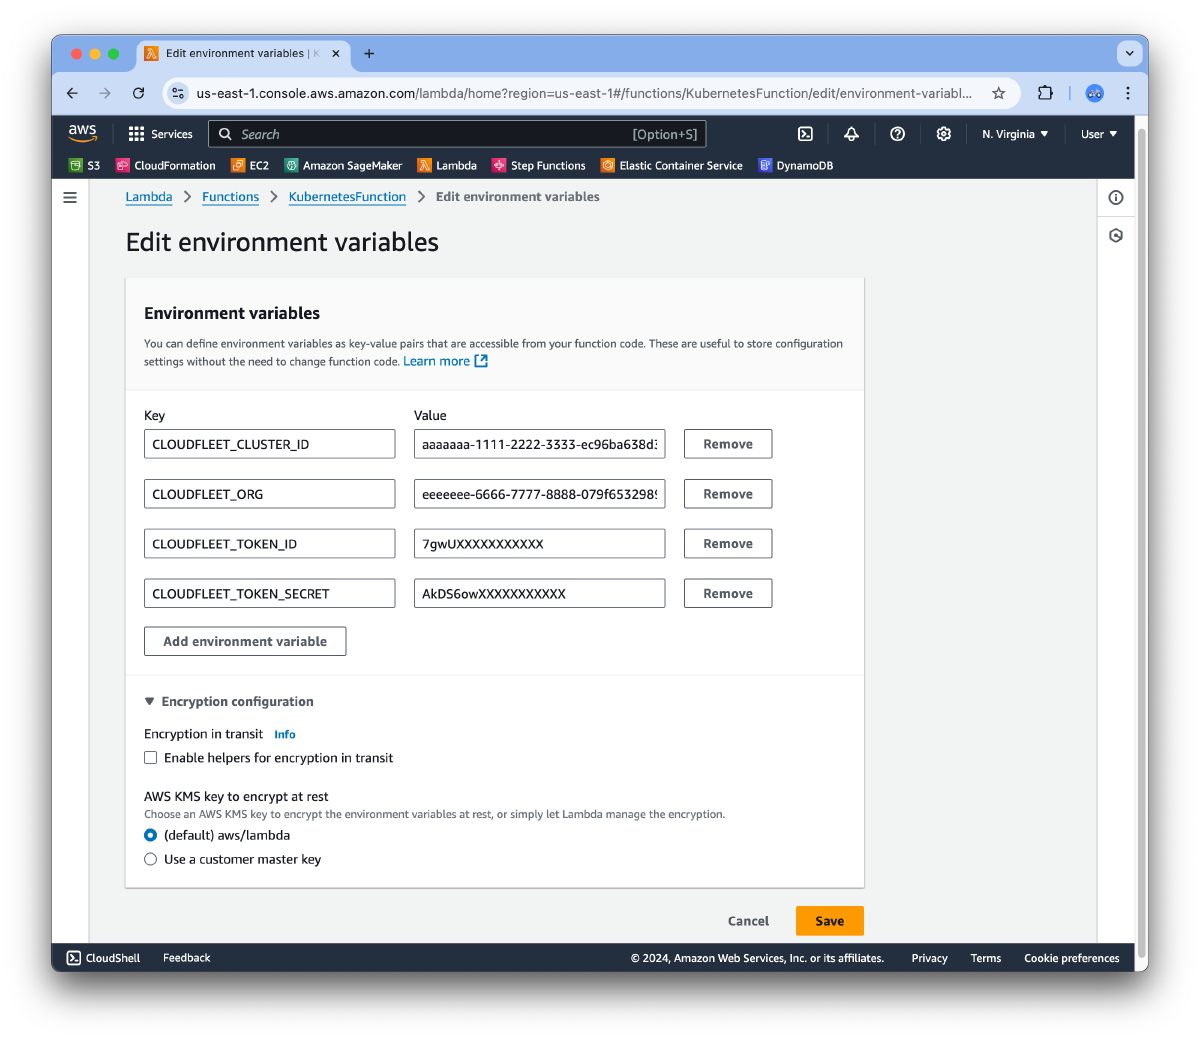
The bootstrap file uses environment variables to authenticate with Cloudfleet and retrieve the kubeconfig file. To set these environment variables, click the “Configuration” tab in the function console, and in the “Environment variables” section, add the following variables:
CLOUDFLEET_ORG: Your Cloudfleet organization IDCLOUDFLEET_CLUSTER_ID: Your Cloudfleet cluster IDCLOUDFLEET_TOKEN_ID: Your Cloudfleet service account client IDCLOUDFLEET_TOKEN_SECRET: Your Cloudfleet service account client secret
The values for these environment variables can be obtained from the Cloudfleet console. The final result should look like the picture below. Click the “Save” button to apply the changes.
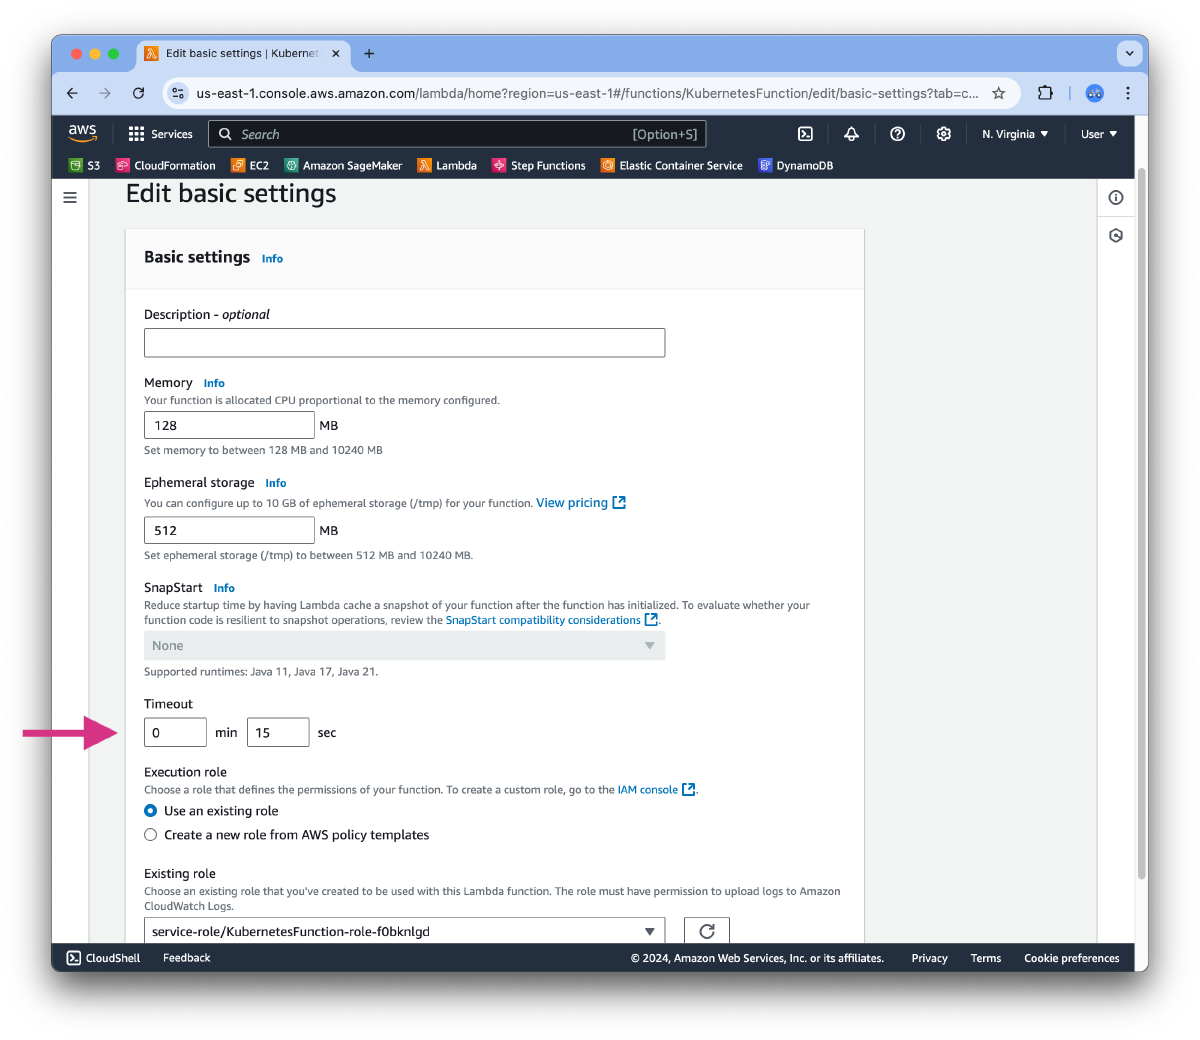
- Adjust the default timeout settings for the Lambda function. You can find these settings in the “Configuration” tab under the “General configuration” section of the function console. Change the timeout value from the default 3 seconds to a higher value, such as 15 seconds, to allow the function to handle longer-running tasks.
At this point, our Lambda function is ready to run.
Test the Kubernetes Lambda Function
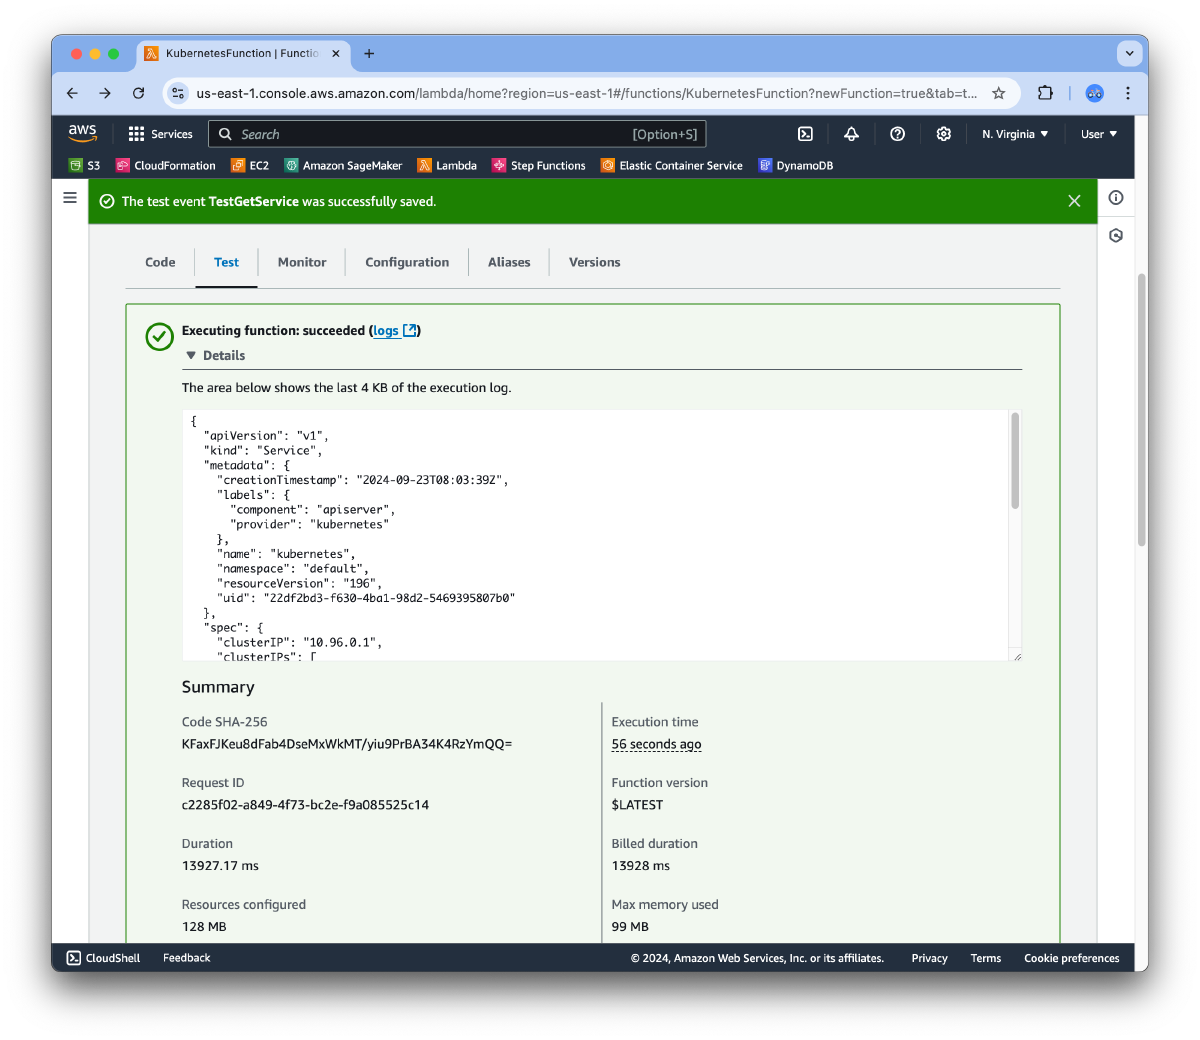
To test the Lambda function, you can create a test event in the AWS Lambda console. Open the “Test” tab in the AWS Lambda console, provide a name for the test event, such as TestGetService, and click the “Save” button. You can use the following sample event data:
["get", "service", "kubernetes"]
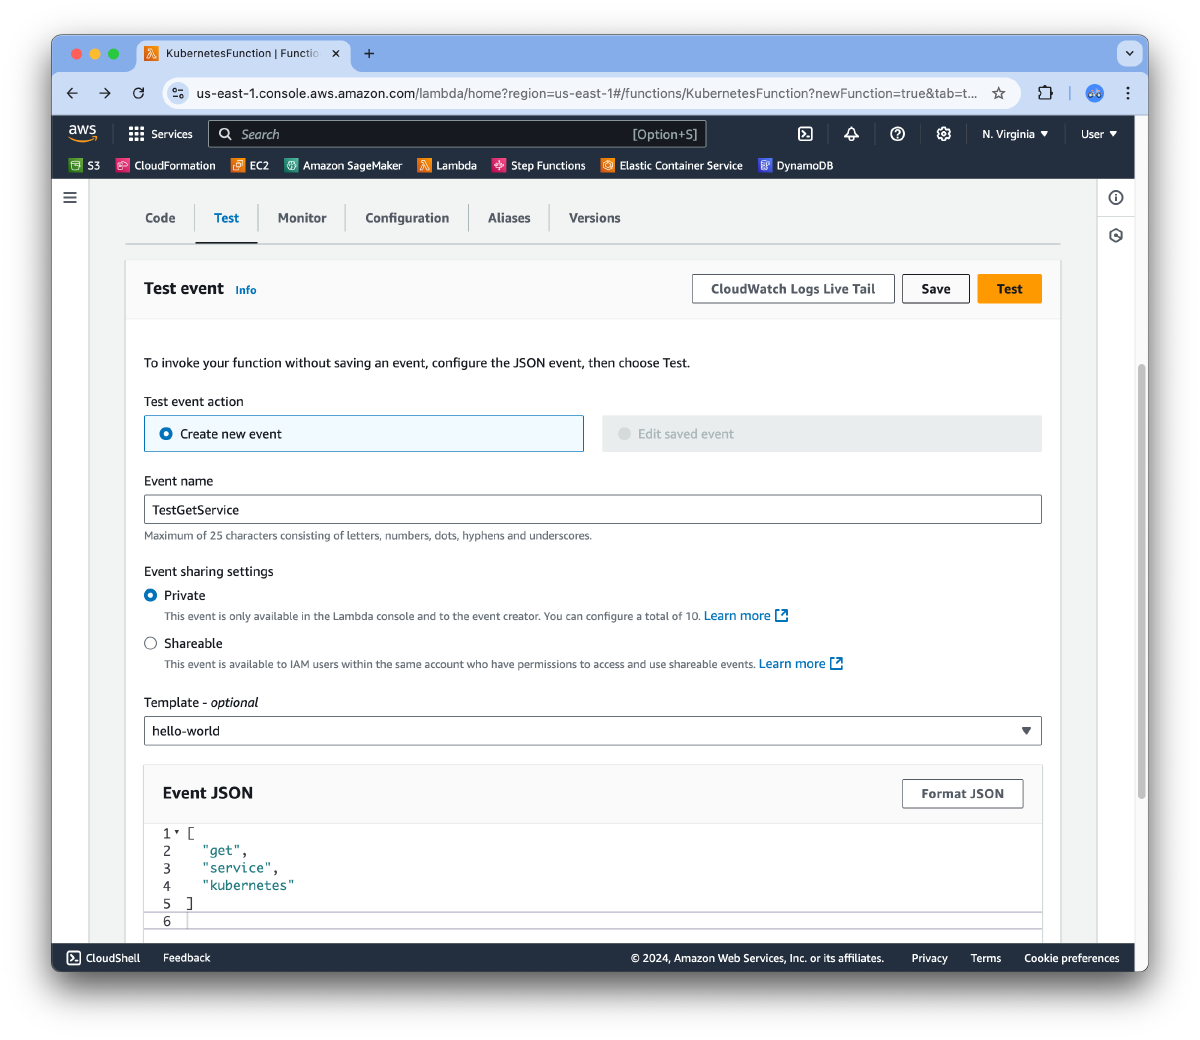
Click the “Test” button to run the function with the provided test event data. The function will execute the kubectl get service kubernetes command in the Kubernetes cluster and return the output in JSON format.
Create a Kubernetes Job with AWS Lambda
Now that we have a Lambda function capable of interacting with the Kubernetes cluster, we can proceed to create a Kubernetes Job directly from the Lambda function. In real-world scenarios, the Lambda function could be triggered by external events, such as file uploads, API requests, or messages from other AWS services, and then dynamically create Kubernetes Jobs based on the Lambda output. For the purpose of this guide, we will use another Lambda test event to create a Kubernetes Job.
As a sample job, we will reuse an example from the Kubernetes documentation. This job takes about 10 seconds to complete and computes π to 2000 decimal places:
# https://kubernetes.io/examples/controllers/job.yaml
apiVersion: batch/v1
kind: Job
metadata:
  name: pi
spec:
  template:
    spec:
      containers:
      - name: pi
        image: perl:5.34.0
        command: ["perl",  "-Mbignum=bpi", "-wle", "print bpi(2000)"]
      restartPolicy: Never
  backoffLimit: 4
- Create a new test event,
TestCreateJob, in the AWS Lambda console with the following event data:
["apply", "-f", "https://kubernetes.io/examples/controllers/job.yaml"]
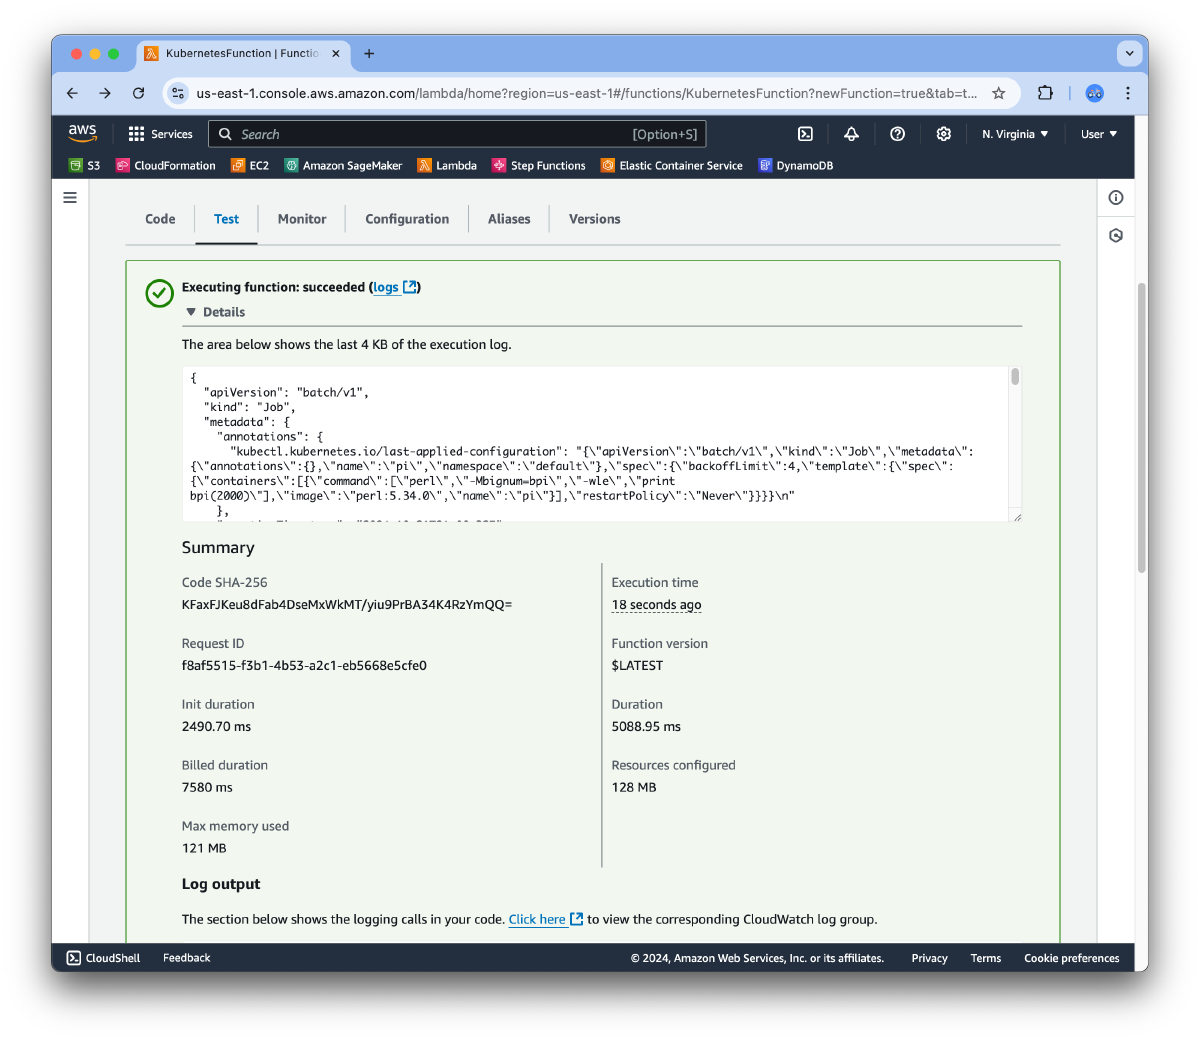
- Click the “Test” button to run the function with the provided test event data. The function will execute the
kubectl apply -f https://kubernetes.io/examples/controllers/job.yamlcommand in the Kubernetes cluster and return the output in JSON format.
- Monitor the Kubernetes Job in the Cloudfleet kubernetes cluster using the
kubectlcommand-line tool. You can check the status of the Job, the Pods created by the Job, and the output of the Job by running the following commands:
$  kubectl get jobs
NAME   COMPLETIONS   DURATION   AGE     CONTAINERS   IMAGES
pi     1/1           2m         2m49s   pi           perl:5.34.0

$  kubectl get nodeclaims
NAME                    TYPE                          CAPACITY    ZONE   NODE                     READY   AGE
hetzner-managed-vn746   HETZNER-ASH-CPX11-ON-DEMAND   on-demand   east   classic-bass-537695025   True    2m49s

$  kubectl get nodes
NAME                     STATUS   ROLES    AGE     VERSION
classic-bass-537695025   Ready    <none>   2m15s   v1.29.3

$  kubectl get pods
NAME       READY   STATUS      RESTARTS   AGE    IP            NODE
pi-x44r4   0/1     Completed   0          2m49s  10.244.9.79   classic-bass-537695025

$  kubectl logs pi-x44r4
3.14159265358979323846264......
In our cluster configuration, we have a single fleet set up as a Managed Fleet with Hetzner as the cloud provider. When we scheduled the job, Cloudfleet Kubernetes Engine automatically provisioned a new node to run the job. Once the job was completed, the node was terminated.
Conclusion
Integrating AWS Lambda with Kubernetes allows you to create a flexible, scalable solution for running dynamic workloads. By combining the serverless power of AWS Lambda with the container orchestration capabilities of Kubernetes, you can automate tasks, trigger jobs based on external events, and optimize resource usage by provisioning nodes only when needed. This approach not only helps reduce costs but also simplifies the management of complex, event-driven workflows.
In this guide, we’ve walked through setting up a Lambda function that can interact with a Kubernetes cluster, execute commands, and create Kubernetes Jobs. This setup can be easily adapted to various real-world scenarios, such as data processing pipelines, scheduled tasks, and event-driven architecture. With the powerful combination of AWS Lambda and Kubernetes, you can build a truly robust cloud-native system that scales effortlessly with your business needs.
Feel free to experiment further, customize the job templates, and explore how this integration can fit into your infrastructure.