Create GPU Kubernetes cluster with Lambda cloud
Lambda is a leading cloud provider that specializes in delivering high-performance AI infrastructure, offering fast and modern NVIDIA GPUs to empower deep learning initiatives. Their cutting-edge hardware and cloud solutions have garnered the trust of industry giants like Microsoft, Intel, and Amazon Research, enabling teams to accelerate their AI breakthroughs.
Lambda has a strong track record and a clear commitment to advancing AI. Their public cloud offering stands out for its excellent hardware rental options. However, it currently does not include built-in container orchestration features like Kubernetes, which have become increasingly important for managing AI/ML workloads.
This is where Cloudfleet comes in. Cloudfleet Kubernetes Engine, a managed Kubernetes solution that runs across different infrastructure platforms, supports running Lambda servers as a compute node using the self-managed nodes feature.
In this tutorial, we explore how to create a Lambda server with a GPU and later add it to Cloudfleet Kubernetes Engine and run a simple Kubernetes Pod using the GPU.
Spinning up a Lambda cloud GPU instance
After signing up, verifying your email and logging into your Lambda Cloud dashboard for the first time, you should be presented with a screen that looks like this:
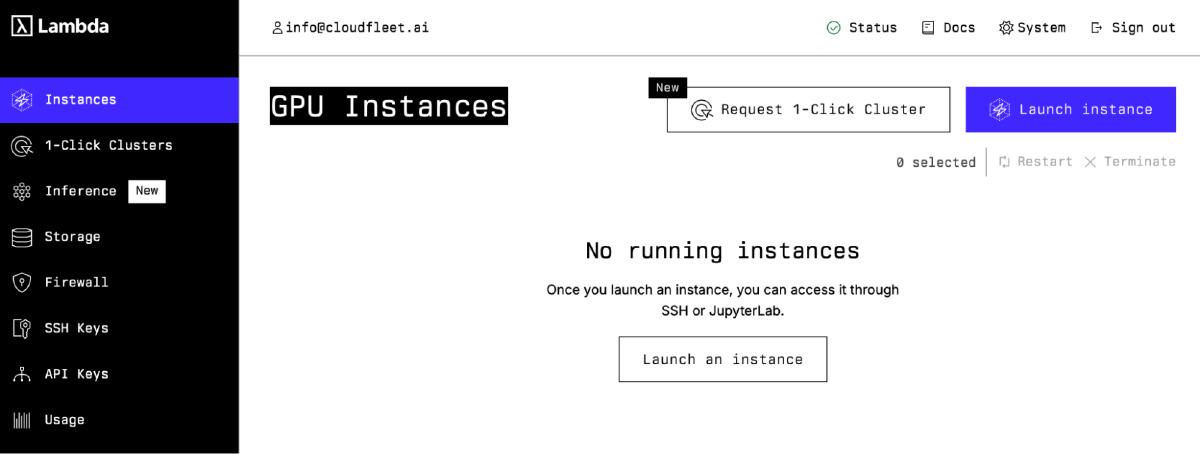
From this screen you should click the “Launch Instance” button where you will be presented with a screen with available server options:
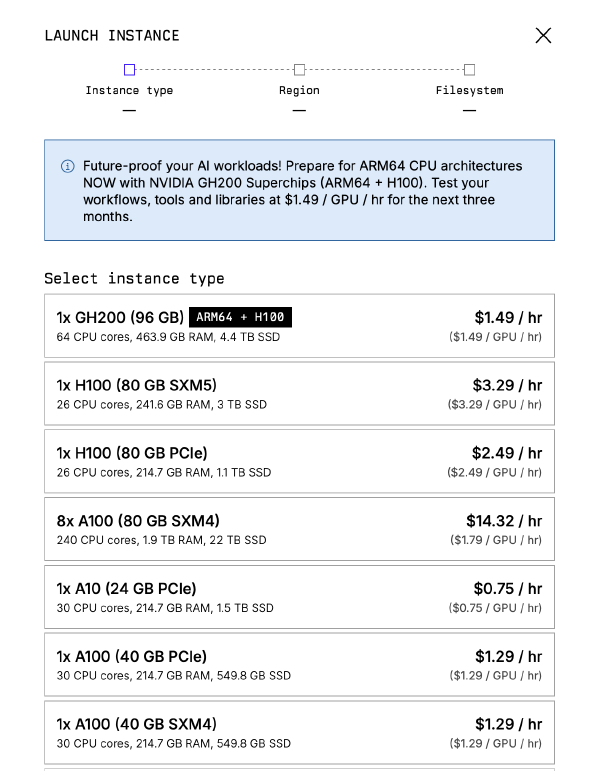
Let us select this time the GH200 (Gracehopper) instance type which has a NVIDIA-made ARM CPU. Cloudfleet supports ARM architecture but if your software does not, you should continue with a x64-based instance.
On the next step, we are choosing the region where our instance will be launched at:
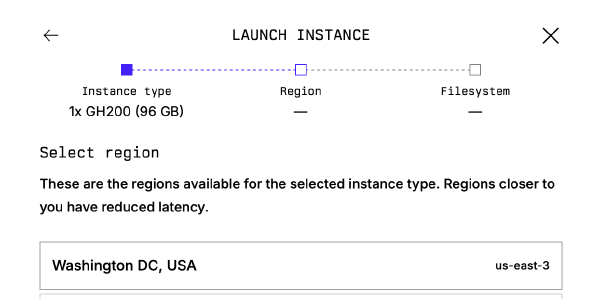
At this time, GH200 instances are only available in Washington. Cloudfleet works globally and it really does not matter where the instance is deployed at. That’s why we are proceeding with Washington.
On the next step, we are asked to attach a filesystem. Filesystems at Lambda are used to persist data across different instances. We are given the option of not attaching a filesystem. We do not need to persist data across instances, so let us click on “Don’t attach a filesystem”:
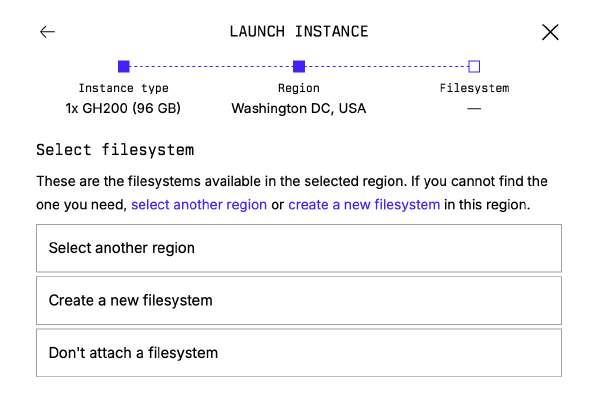
Finally we are asked to add our existing public SSH key or generate a new one.
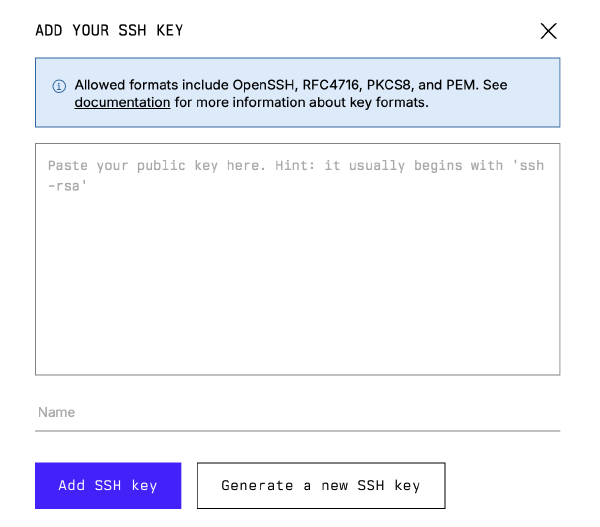
Let’s assume that we do not have a pre-existing key, and let’s create a new one by clicking “Generate a new SSH key” and naming it “cloudfleet.” Creating the SSH key will trigger the download of the private key. To use the downloaded private key to access the SSH, we need to change its permissions. We can do this by running the following command:
chmod 600 cloudfleet.pem
Lambda asks us to agree to the terms and conditions as the last step, then start launching the instance. In few minutes we will see our instance running:

Just to make sure, let us try now connecting to our new instance via SSH using the information above and our private key:
ssh ubuntu@192.222.59.83 -i cloudfleet.pem
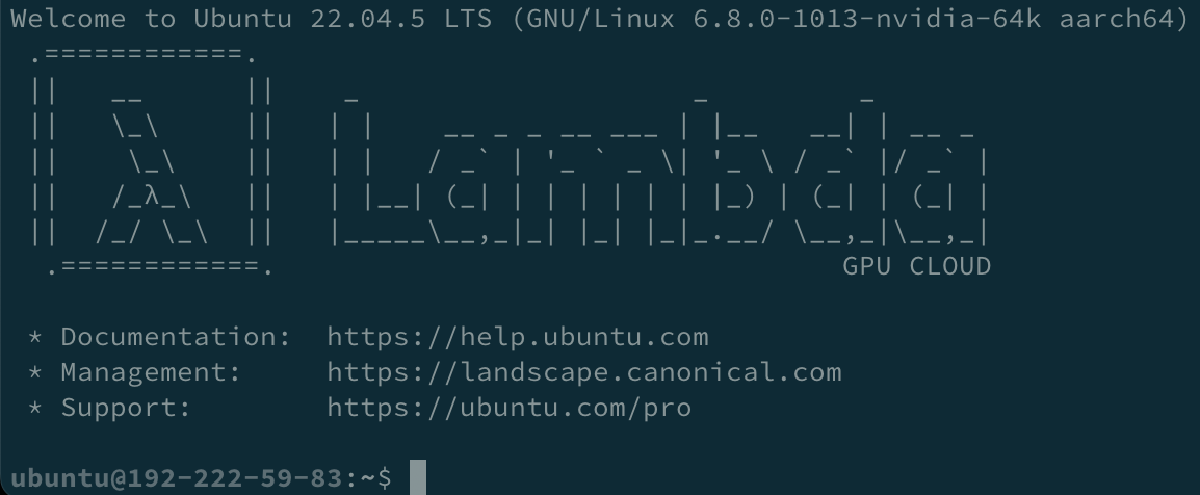
We’ve a running GPU instance and can proceed to add it to the Cloudfleet Kubernetes cluster!
Create a Cloudfleet account and cluster
After setting up the VM, the next step is to create a Kubernetes cluster in Cloudfleet. For this tutorial, we will use a free Kubernetes cluster that you can create in any Cloudfleet account after registering.
Follow these steps to create a Cloudfleet cluster:
-
Complete the account registration and sign in to the Cloudfleet console.
-
In the console, click Create Cluster and follow the setup wizard. You can select a control plane region close to you, but remember that you can add nodes from any location, regardless of the control plane’s region.
-
Once the cluster is created, click Connect to Cluster and follow the instructions to install the Cloudfleet CLI and configure authentication. At the end of the setup, you’ll see instructions on how to access the cluster with kubectl.
After completing these steps, verify that the cluster is running:
$ kubectl cluster-info
Kubernetes control plane is running at https://c515a6f3-b61a-451f-87c1-cc4600b172e3.northamerica-central-1.cfke.cloudfleet.dev:6443
CoreDNS is running at https://c515a6f3-b61a-451f-87c1-cc4600b172e3.northamerica-central-1.cfke.cloudfleet.dev:6443/api/v1/namespaces/kube-system/services/coredns:udp-53/proxy
Your cluster ID will differ from the example above. You can find the cluster ID on the Cloudfleet console; the first part of the control plane URL is also the cluster ID. (In this case, “c515a6f3-b61a-451f-87c1-cc4600b172e3”.) You will need your cluster ID for the next step, so take note of it.
Next, confirm that no nodes are currently registered:
$ kubectl get nodes
No resources found.
At this stage, the cluster has no nodes because we haven’t added any yet. Let’s add one now.
Add the Lambda cloud instance to the Cloudfleet Kubernetes cluster
Although Cloudfleet supports managing the lifecycle of nodes automatically for many cloud providers, for platforms like Lambda, Cloudfleet’s self-managed nodes feature enables seamless integration of regular Linux VMs into Kubernetes clusters.
Now, let’s add the Lambda node to the cluster using the Cloudfleet CLI, which we previously installed and configured.
In our case, the command looks like this:
cloudfleet clusters add-self-managed-node c515a6f3-b61a-451f-87c1-cc4600b172e3 --host 192.222.59.83 --ssh-username ubuntu --ssh-key cloudfleet.pem --region us-east-3 --zone us-east-3 --install-nvidia-drivers
Do not forget to change the cluster ID, IP address and the SSH key location with your values.
region and zone are mandatory flags used to specify the node’s region and zone. You can assign any meaningful string to these values, which are then mapped to Kubernetes node labels (`topology.kubernetes.io/region` and `topology.kubernetes.io/zone`). These labels enable workload scheduling based on node topology. We used in this example “us-east-3” because Lambda calls the Washington region by that name.
You can find more information about this command in the Cloudfleet documentation.
When we execute the command, the Cloudfleet CLI installs the required packages and files on the VM. Once complete, it starts the kubelet, which automatically registers the node with the Kubernetes cluster.
In a few seconds, we can list the nodes again to confirm that the new node has joined the cluster:
$ kubectl get nodes
NAME   STATUS     ROLES    AGE    VERSION
192-222-59-83   Ready    <none>   24s    v1.31.3
If we describe the node to see its details:
kubectl describe nodes 192-222-59-83
Name:               192-222-59-83
Roles:              <none>
Labels:             beta.kubernetes.io/arch=arm64
                    beta.kubernetes.io/os=linux
                    cfke.io/accelerator-manufacturer=NVIDIA
                    cfke.io/provider=self-managed
                    cfke.io/provider-region=us-east-3
                    cfke.io/provider-zone=us-east-3
                    failure-domain.beta.kubernetes.io/region=us-east-3
                    failure-domain.beta.kubernetes.io/zone=us-east-3
                    internal.cfke.io/can-schedule-system-pods=true
                    kubernetes.io/arch=arm64
                    kubernetes.io/hostname=192-222-59-83
                    kubernetes.io/os=linux
                    topology.kubernetes.io/region=us-east-3
                    topology.kubernetes.io/zone=us-east-3
....
Capacity:
  cpu:                64
  ephemeral-storage:  4161736552Ki
  hugepages-16Gi:     0
  hugepages-2Mi:      0
  hugepages-512Mi:    0
  memory:             551213760Ki
  nvidia.com/gpu:     1
  pods:               110
Allocatable:
  cpu:                64
  ephemeral-storage:  3835456399973
  hugepages-16Gi:     0
  hugepages-2Mi:      0
  hugepages-512Mi:    0
  memory:             551111360Ki
  nvidia.com/gpu:     1
We see “nvidia.com/gpu: 1” in the capacity section which shows us that the GPU is now available to be used in a Pod.
Deploy a Pod using the GPU
Now, let’s put everything together and run a Pod that uses the NVIDIA GPU and CUDA. We can run the following command to deploy an example Pod:
$ cat <<EOF | kubectl apply -f -
apiVersion: v1
kind: Pod
metadata:
  name: gpu-test
spec:
  restartPolicy: OnFailure
  containers:
    - name: cuda-vector-add
      # https://catalog.ngc.nvidia.com/orgs/nvidia/teams/k8s/containers/cuda-sample
      image: "nvcr.io/nvidia/k8s/cuda-sample:vectoradd-cuda11.7.1-ubuntu20.04"
      resources:
        limits:
          nvidia.com/gpu: 1
EOF
Please pay attention to the “limits” section, where we instruct Kubernetes to run this Pod on a node that has a GPU, which is our Lambda node.
Let us see if the Pod is successfully scheduled:
$ kubectl get pods
NAME                READY   STATUS    RESTARTS   AGE
gpu-test   1/1     Running   0          5s
And finally we can view the logs of the Pod to make sure everything worked as expected:
$ kubectl logs gpu-test
[Vector addition of 50000 elements]
Copy input data from the host memory to the CUDA device
CUDA kernel launch with 196 blocks of 256 threads
Copy output data from the CUDA device to the host memory
Test PASSED
Done
Next steps
That’s a wrap!
In this tutorial, we covered the quickest way to set up a Kubernetes cluster on Lambda. We’ve seen how to create a Lambda instance with a modern GPU and add it to Cloudfleet’s managed Kubernetes cluster, and run a GPU job on it.
With Cloudfleet, you can create a free Kubernetes cluster in minutes without manually managing infrastructure. Cloudfleet allows you to bring all your infrastructure providers together under one single Kubernetes cluster, creating a global “supercomputer” with just a few clicks.
To learn more about Cloudfleet, visit our homepage.